How to Label Your Personal Mixer
Over the years, we’ve seen lots of different approaches to labeling the channels on Aviom Personal Mixers.
There’s no right way or wrong way, of course, and you should label your mixer however works for you. The approach you take will be determined by a number of different factors, including what materials you have handy, the lighting conditions you play in, how frequently you’re changing things, whether everyone wants the same label or a unique one, and even how good your eyesight is.
All that said, here are some tips and a rundown of the most common techniques and their advantages and disadvantages.
#1 Sharpie and tape.
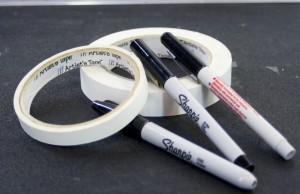 The old rock-and-roll standard and for good reason: materials are cheap, and it’s fast and easy. The downside is that it can be harder to read, and each label has to be written out individually. (Of course, that makes it easy to customize, so Channel 6 can be “Voc 4,” “John,” or “ME” depending on whose mixer you’re looking at.)
Suggestions:
- Try an extra fine tip Sharpie for more legibility. (You can also get “ultra fine,” but most of us here think it’s too thin.)
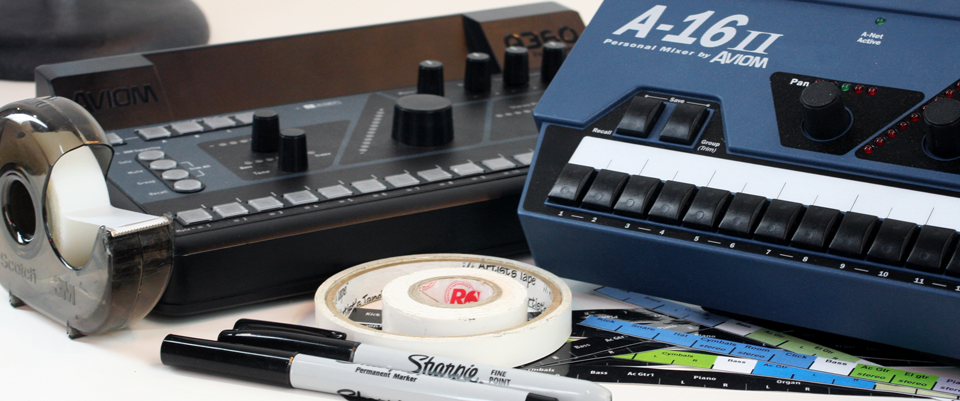
- “Magic” transparent tape (the stuff with the matte finish not the gloss finish) works great on the A-16II because you can see the white scribble strip showing through as the background. Sharpie ink won’t smear when you write directly on this tape if you give it a few seconds to dry. 1/2” tape fits the best.
- White artist tape, board tape, or gaffer’s tape (just Google it) is great tape for labeling gear because it holds ink well and doesn’t leave nasty adhesive goo behind. 1/2” artist’s tape fits great on Aviom Personal Mixers.
- Work on a dark stage a lot? Try glow tape!
- Don’t ever label with masking tape. Please. We’re begging you! It leaves an awful mess behind when you try to remove it, especially if it’s been left in place for a while.
#2 Computer and printer.
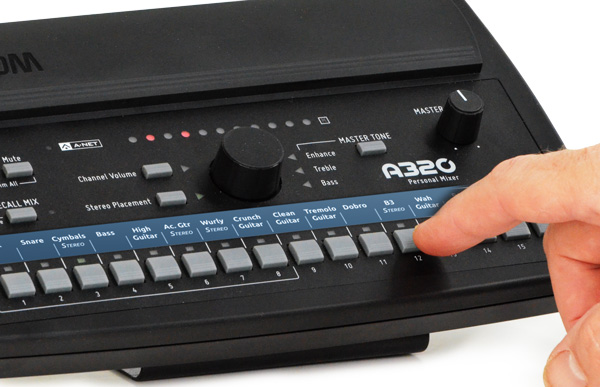 Whenever we do events where we’re demoing mixers, we often get some oohs and aahs over the labels that we have on our mixers.
We generally make our labels using Adobe® Illustrator®. Of course it takes a bit of work to set up the files to get the spacing right and all that, but once it’s done, it’s pretty fast and easy, especially if you’re labeling a bunch of mixers the same way. And guess what! We’ve done all that work so you don’t have to! Download a template here.
Suggestions:
- If you have access to a good color printer, make your labels color. Group similar channels together in the same color scheme for easier scanning. Consider using bright, high-contrast colors for the “ME” channel on each mixer.
- If you can, use a paper cutter to trim the labels. It may seem obvious, but straight edges really do make things look nicer, and they help guide your eye.
- For extra durability, laminate your sheet of labels either before or after trimming. (If you do it after trimming, you’ll obviously have to trim again after laminating.)
- To attach the labels to your mixer, use transparent tape, artist or gaffer’s tape, or removable double-sided sticky pads. Don’t use masking tape for this either! Please.



I’m having the same issue, the cells are off from the actual unit. I’m using the excel (in Numbers) for the A320 model. When I print, I have the scale set to 100%.
where is the link for the excel template, I can’t find it anywhere on your site
Sorry for the slow reply. We had a technical issue blocking comments from us. Sorry about that! You can find the template in this .zip archive. (It’s in the Support section.) Let us know if you need any further help.
Thank you, Caleb. Sorry for the hassle. Can you tell us which template you were using: Illustrator or Excel? And what personal mixer, the A-16II or the A360? Also, make sure there is no scaling set in your print dialogue because this can mess up the spacing.